What happens to my biopsy after surgery?

7 Crucial steps: operation to diagnosis


Have you ever wondered what happens to your biopsy after surgery? Why results seem to take forever, when all the TV shows have results in a few hours? You’re anxious for results, and you don’t understand why it’s taking so long.

In the real world, the tissue samples go through time-sensitive steps, with some steps taking hours. Sample preparation is key to ensuring the pathologist can make a proper diagnosis.

So, what happens to the tissue once it reaches the lab?

Why does it take so long?

Read on to find out what happens to your biopsy after surgery.

1. The preservation stage

Any tissue taken from the body will start to decay almost immediately. Therefore, the surgeon will place the tissue into a preservative (fixative) as soon as possible, then transport it to the laboratory. The laboratory which handles surgical samples is called “Histopathology”.

The primary fixative used in most clinical histopathology laboratories is 10% Neutral Buffered Formalin. The purpose of formalin is to preserve the tissue in a life-like state so that it doesn’t decay. Kind of like pickling food to preserve it. 

It also hardens the tissue a little, making it easier to dissect later. Some tissue types can undergo a rapid fixation process (less than 6 hours). However, most samples need between 6-24 hours in formalin, and can take up to 72 hours to properly fix very thick or hard tissue. As a rule, formalin takes about 1 hour to penetrate 1mm of tissue.

Tissues must sit in formalin for 6-24 hours minimum to allow penetration and proper fixation of tissue. Un-fixed or poorly fixed tissue causes problems down the line.

2. The Dissection Stage

Most tissues need dissecting to prepare them for an accurate diagnosis. The Royal College of Pathologists of Australasia (RCPA) have guidelines for dissecting the various tissue types. Liver, bowel, breast, appendix, gallbladder, skin, for example, are all dissected in different ways. 

Some or all of the dissected tissue may be submitted for diagnosis, depending on clinical information supplied by the clinicians involved with the patient. Only trained Medical Laboratory Scientists, Registrars (trainee pathologists), or Pathologists, can do this complex work. Not all tissues need dissecting. For example, a 1-5 mm-sized bowel biopsy can be processed whole.

A bisected (cut in half) skin punch biopsy, placed in a cassette (caged specimen holder), ready to be processed so a diagnosis can be given.

Skin Punch Biopsy - Bisected

Picture shows a bisected (cut in half) skin punch biopsy. The skin surface (epidermis) is at the bottom, the white layer is the dermis, and the yellow part is the subcutaneous fat (deepest layer of the skin). The punch biopsy is in a "cassette" (a small rectangular cage) which is sealed with a lid, then immersed in 10% formalin for fixation. The flat surface on the front of the cassette is where the patient identifiers are permanently etched.


3. The Processing Stage

A Processing Machine’s job is to remove all the water from the cells without damaging them and then gently plump the cells back up using molten paraffin wax in place of water. After tissue dissection the pieces are put into cassettes, which is pre-labelled with the patient’s details. The cassettes containing the tissue are kept submerged in formalin. Then they are loaded into a Processing Machine, where water is gradually removed and replaced with wax.

Since Formalin is water-based, the dehydration of tissue is a gradual process. To get from water to wax infiltration, the tissue needs to go through a series of steps.

Ethanol (alcohol) is the first chemical used to dehydrate the tissue in a processing machine. After being in formalin for a set amount of time the cassettes are moved into a solution of 70% ethanol. This is followed by 90% ethanol which further reduces water content, and then 100% ethanol where all of the water will be washed out and replaced by ethanol only.

In the same way water was replaced by ethanol, the ethanol needs to be replaced with molten paraffin wax. (The wax is warmed to around 60 degrees to make it liquid).

But ethanol doesn’t mix with molten wax, just like oil doesn’t mix with water. So, one more step needs to happen. 

Xylene, a chemical known as a “clearing agent” mixes well with both ethanol and molten paraffin wax. The cassettes pass from ethanol into xylene and gradually the xylene overtakes the ethanol to be the only thing in the cell. This enables the tissue to move into the molten paraffin wax, where the xylene will be completely replaced with paraffin in the cells. This entire process happens over a matter of hours (usually overnight).

To put that in plain language, water is removed from the cell and replaced with wax, which gives the cells a rigid and life-like structure. The wax fills out the cells and plumps them up. Imagine cutting a tomato – it’s squishy inside. Now imagine the water in the tomato is replaced with thick molten wax and allowed to solidify. The cells of the tomato would hold their shape much better and be easier to cut. The same principle applies to human tissues.

Moving the cassettes into molten paraffin wax is the last step in ‘processing’. It’s now ready to move onto the next stage toward your diagnosis.

Diagram of the steps involved in processing tissue. Beginning in water-based formalin, the cassettes with tissue in them move into 70% ethanol, then 90% ethanol, into 100% ethanol. To make it miscable with wax it needs to go into xylene next, then finally paraffin wax. Each step has 2-3 changes of each solution to make sure the one before it is completely washed out.
Steps for processing tissue


4. The Embedding Stage

The tissue is now full of paraffin wax and has lost its ‘squishiness’. The next step is to take the tissue out of the cassette and place it into a mould filled with more molten paraffin wax. 

The tissue is “embedded” in the wax. The cassette, which has the patient identifier on it, then becomes the lid. The wax cools and solidifies providing a rigid frame, in and around the tissue. 

Once cooled, the cassette holding the embedded tissue can be popped out of the mould, the same way we make ice cubes and pop them out once frozen.

Skin tissue after processing. The tissue is taken out of the cassette and placed into a mould with melted paraffin wax, then cooled slightly before putting the cassette with the patient details on top. The whole thing is then sat on ice, which will solidify the tissue inside the wax.

Embedding the tissue pieces

Skin tissue after processing. The tissue is taken out of the cassette and placed into a mould with melted paraffin wax. It's cooled slightly, and the cassette with the patient details is placed on top. Then it's sat on ice, which solidifies the whole thing.

This image shows how the tissue has the wax in and round it, which makes the next stage possible - cutting paper thin sections on a microtome. Note: this tissue has already been cut into. The surface is covered with wax until it is cut away.

Paraffin block after embedding

This image shows how the tissue has the wax in and round it, which makes the next stage possible - cutting paper thin sections on a microtome. Note: this tissue has already been cut into, so you can see the 'full face' of the tissue pieces.


5. The Cutting Stage

Now the tissue is ready for cutting and mounting onto a microscope slide. A lab technician uses a machine called a “microtome” to cut “sections” from the embedded tissue. 

The microtome has a very sharp blade that cuts each section at 4-5 microns thick. For comparison, a standard sheet of A4 copy paper is around 100 microns thick. That means the sections of tissue cut on a microtome are about 20-25 times thinner than a regular sheet of paper!

These very thin sections of the tissue are floated onto the surface of a warm water bath. Using a glass microscope slide with the same patient identifiers on it, the lab technician scoops up the floating section from the water bath onto the microscope slide. The water helps the section adhere to the slide. The slides now need to be stained (dyed) to show tissue components. 

A tissue block in the microtome vice. A wheel makes the block go up and down against the blade, cutting very thin sections.

Block in the microtome

A tissue block in the microtome vice. A wheel makes the block go up and down against the blade, allowing very thin sections to be cut from the tissue.

The cutting motion makes a "ribbon" of adjoining sections. You can take the ribbon and float on the waterbath, where it's picked up on a slide and dried out.

Cutting a "ribbon"

The cutting motion makes a "ribbon" of adjoining sections. You take a length of ribbon and float on the waterbath, to assess quality before picking up on a slide.

Now the tissue is floated on the waterbath and can be picked up on a slide, dried out, and ready for staining.

Floating the tissue

Now the tissue is floated on the waterbath it can be picked up on a slide, dried out, and is ready for staining. The tissue in this section is from the appendix.

6. The Staining Stage

Staining the tissue requires the processing step (stage 3 above) to be reversed. Meaning we need to get rid of the wax and replace it with water because the stains (dyes) are water-based for routine testing (more about this below).

Slides are placed in a 60deg oven which melts the wax. The heat only melts away the wax, but leaves the tissue stuck to the slide. Now going in reverse, Xylene (or substitute) washes out any remaining wax from the cells. The tissue is then re-hydrated. That is, starting with soaking in 100% ethanol, then into 95% ethanol, then to 70% ethanol, then water. The tissue is now ready to take up the dyes.

The routine stain used in Histology labs is called “Haematoxylin and Eosin” stain, or H&E for short. Each dye stains a different part of the tissue, providing a contrast between different cells and different parts of the cell. A glass “coverslip” on top of the slide protects and preserves the stained tissue. The coverslip also serves the purpose of providing a clear platform for looking at the slide under the microscope.

H&E stained section of bowel. Notice the darker and lighter areas; haematoxylin is deep pink/purple, while the eosin is light pink.

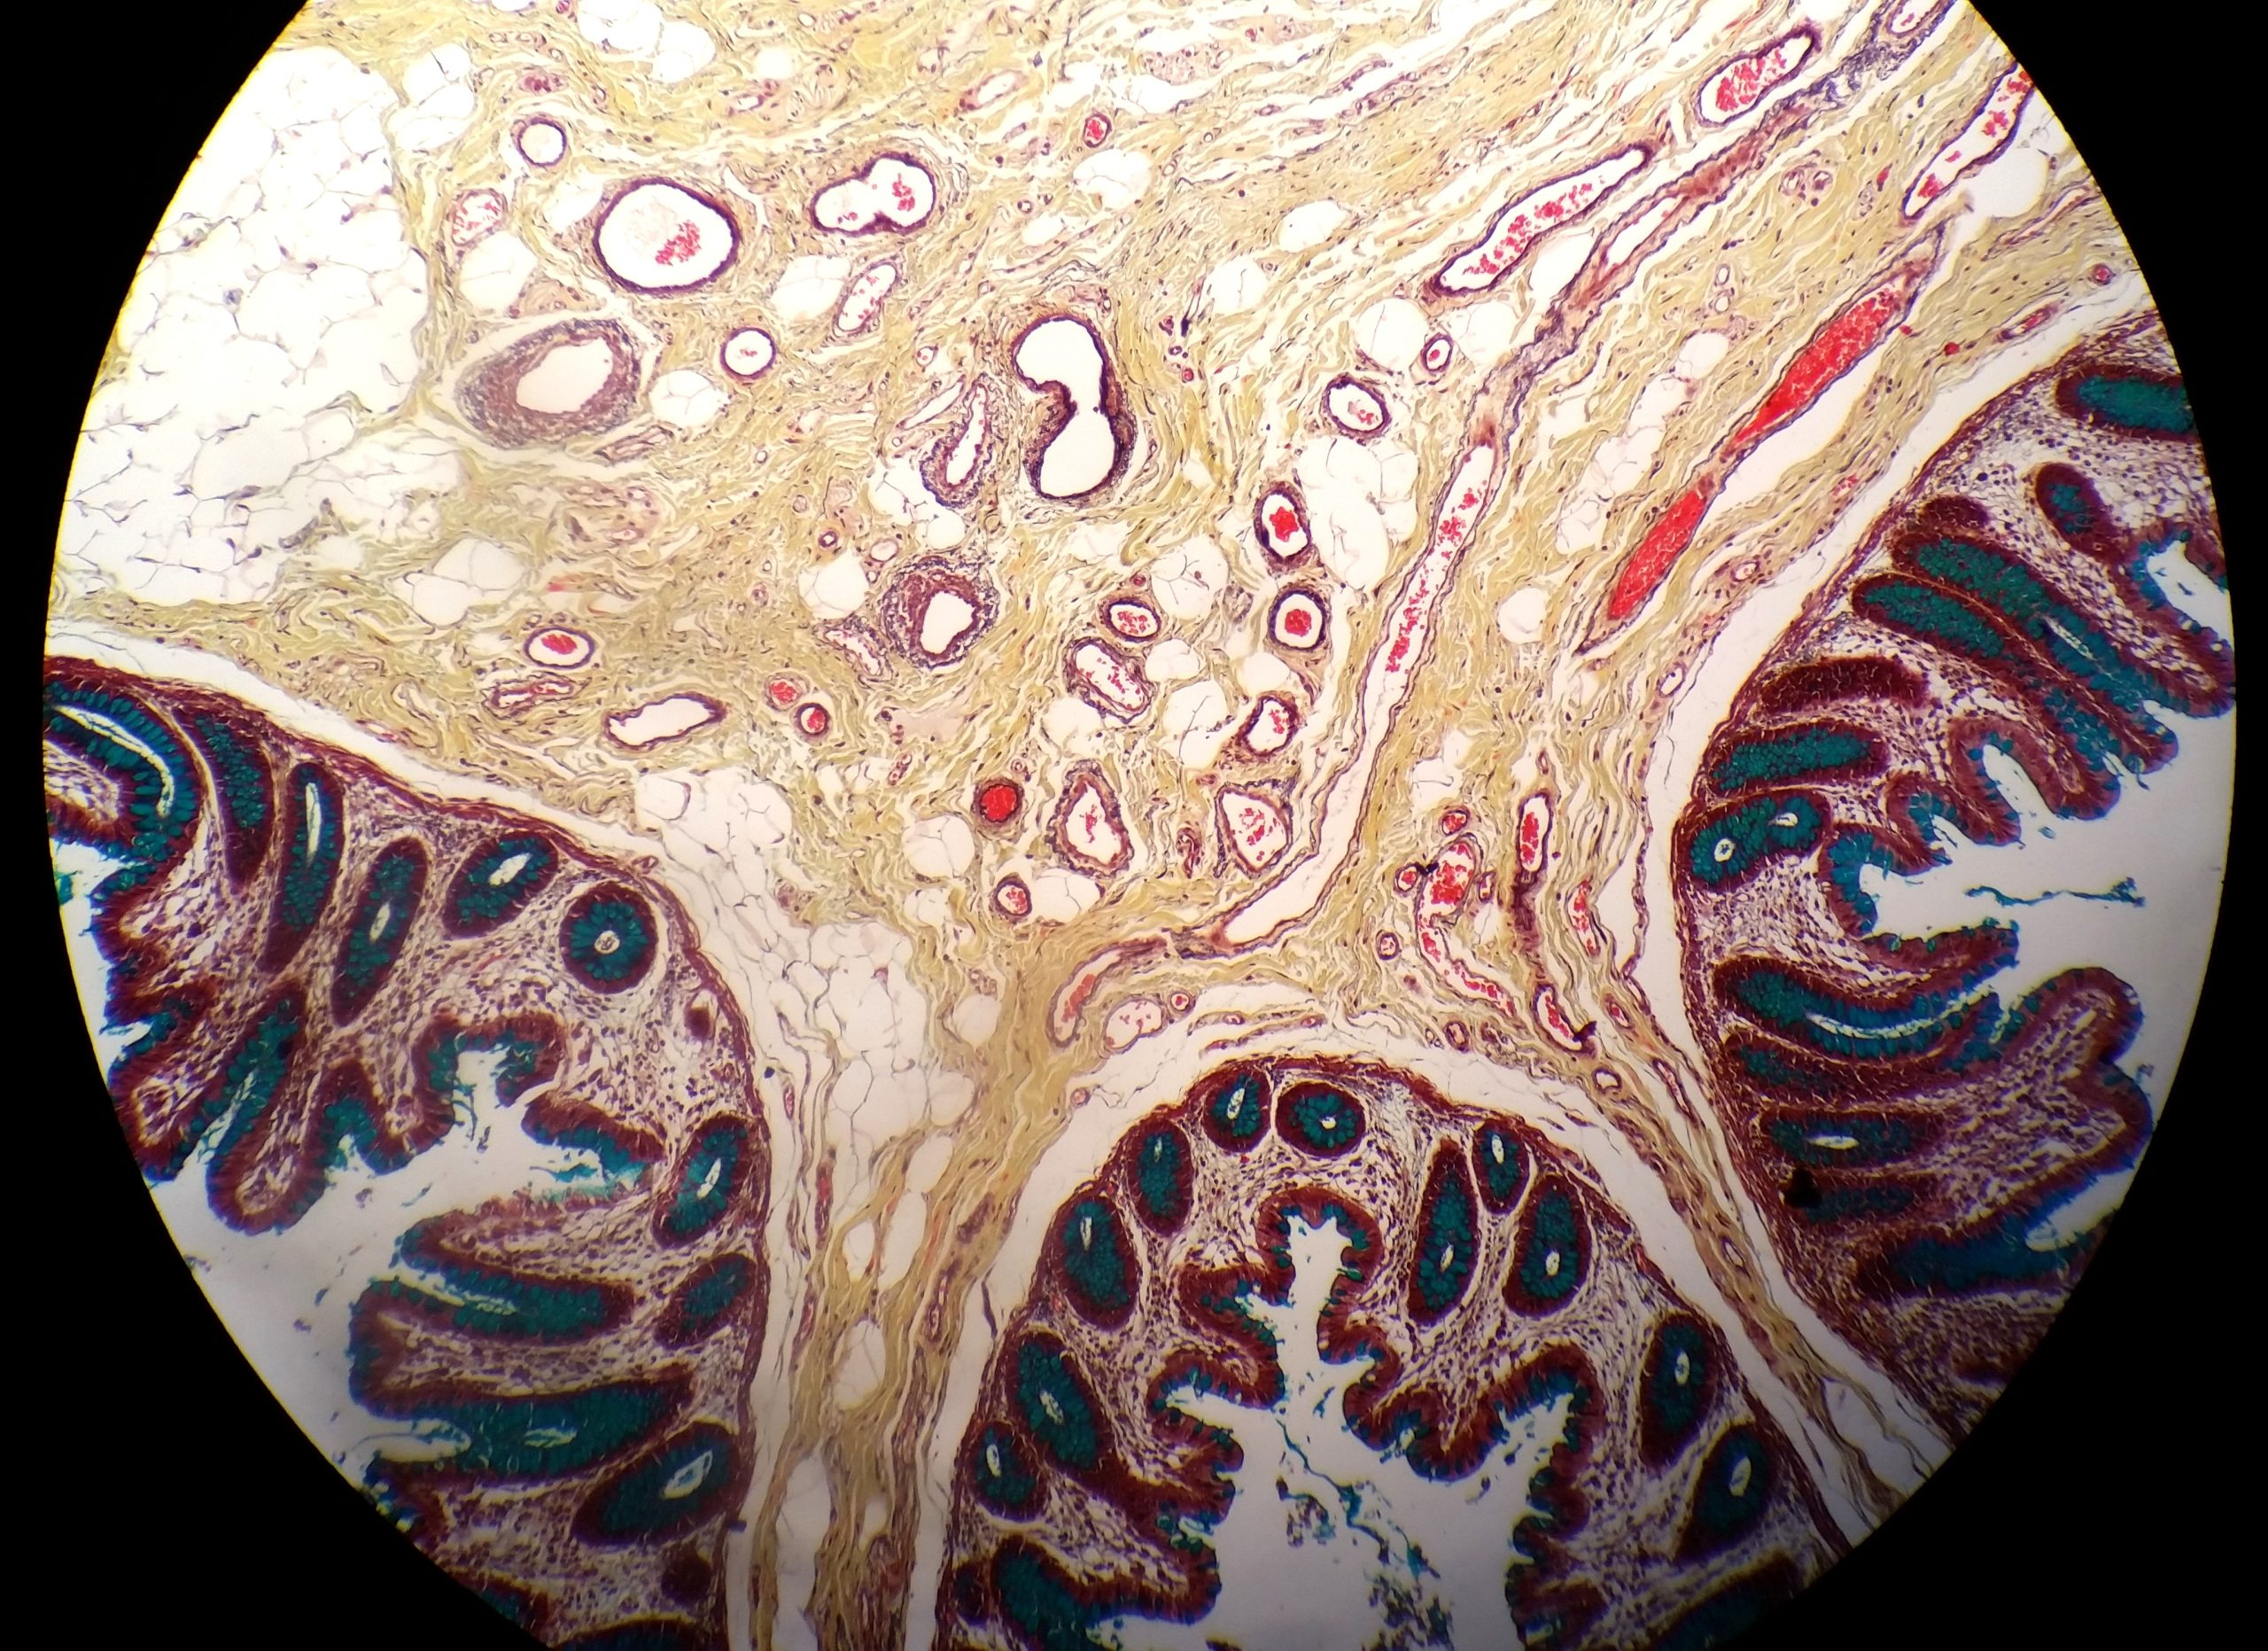
Section of bowel tissue

H&E stained section of bowel (intestine). Note the dark and light areas; haematoxylin is deep pink/purple, while the eosin is light pink, showing different cellular features.

This is a section of brain tissue. Stained with H&E, it shows the difference between the "white matter" and "grey matter" areas within the brain.

Section of brain tissue

Brain tissue stained with H&E shows
the difference between the "white matter" and "grey matter" areas
within the brain.

This H&E stained slide shows skin tissue. It was sliced like a loaf of bread and laid on its side to get a full-thickness view.

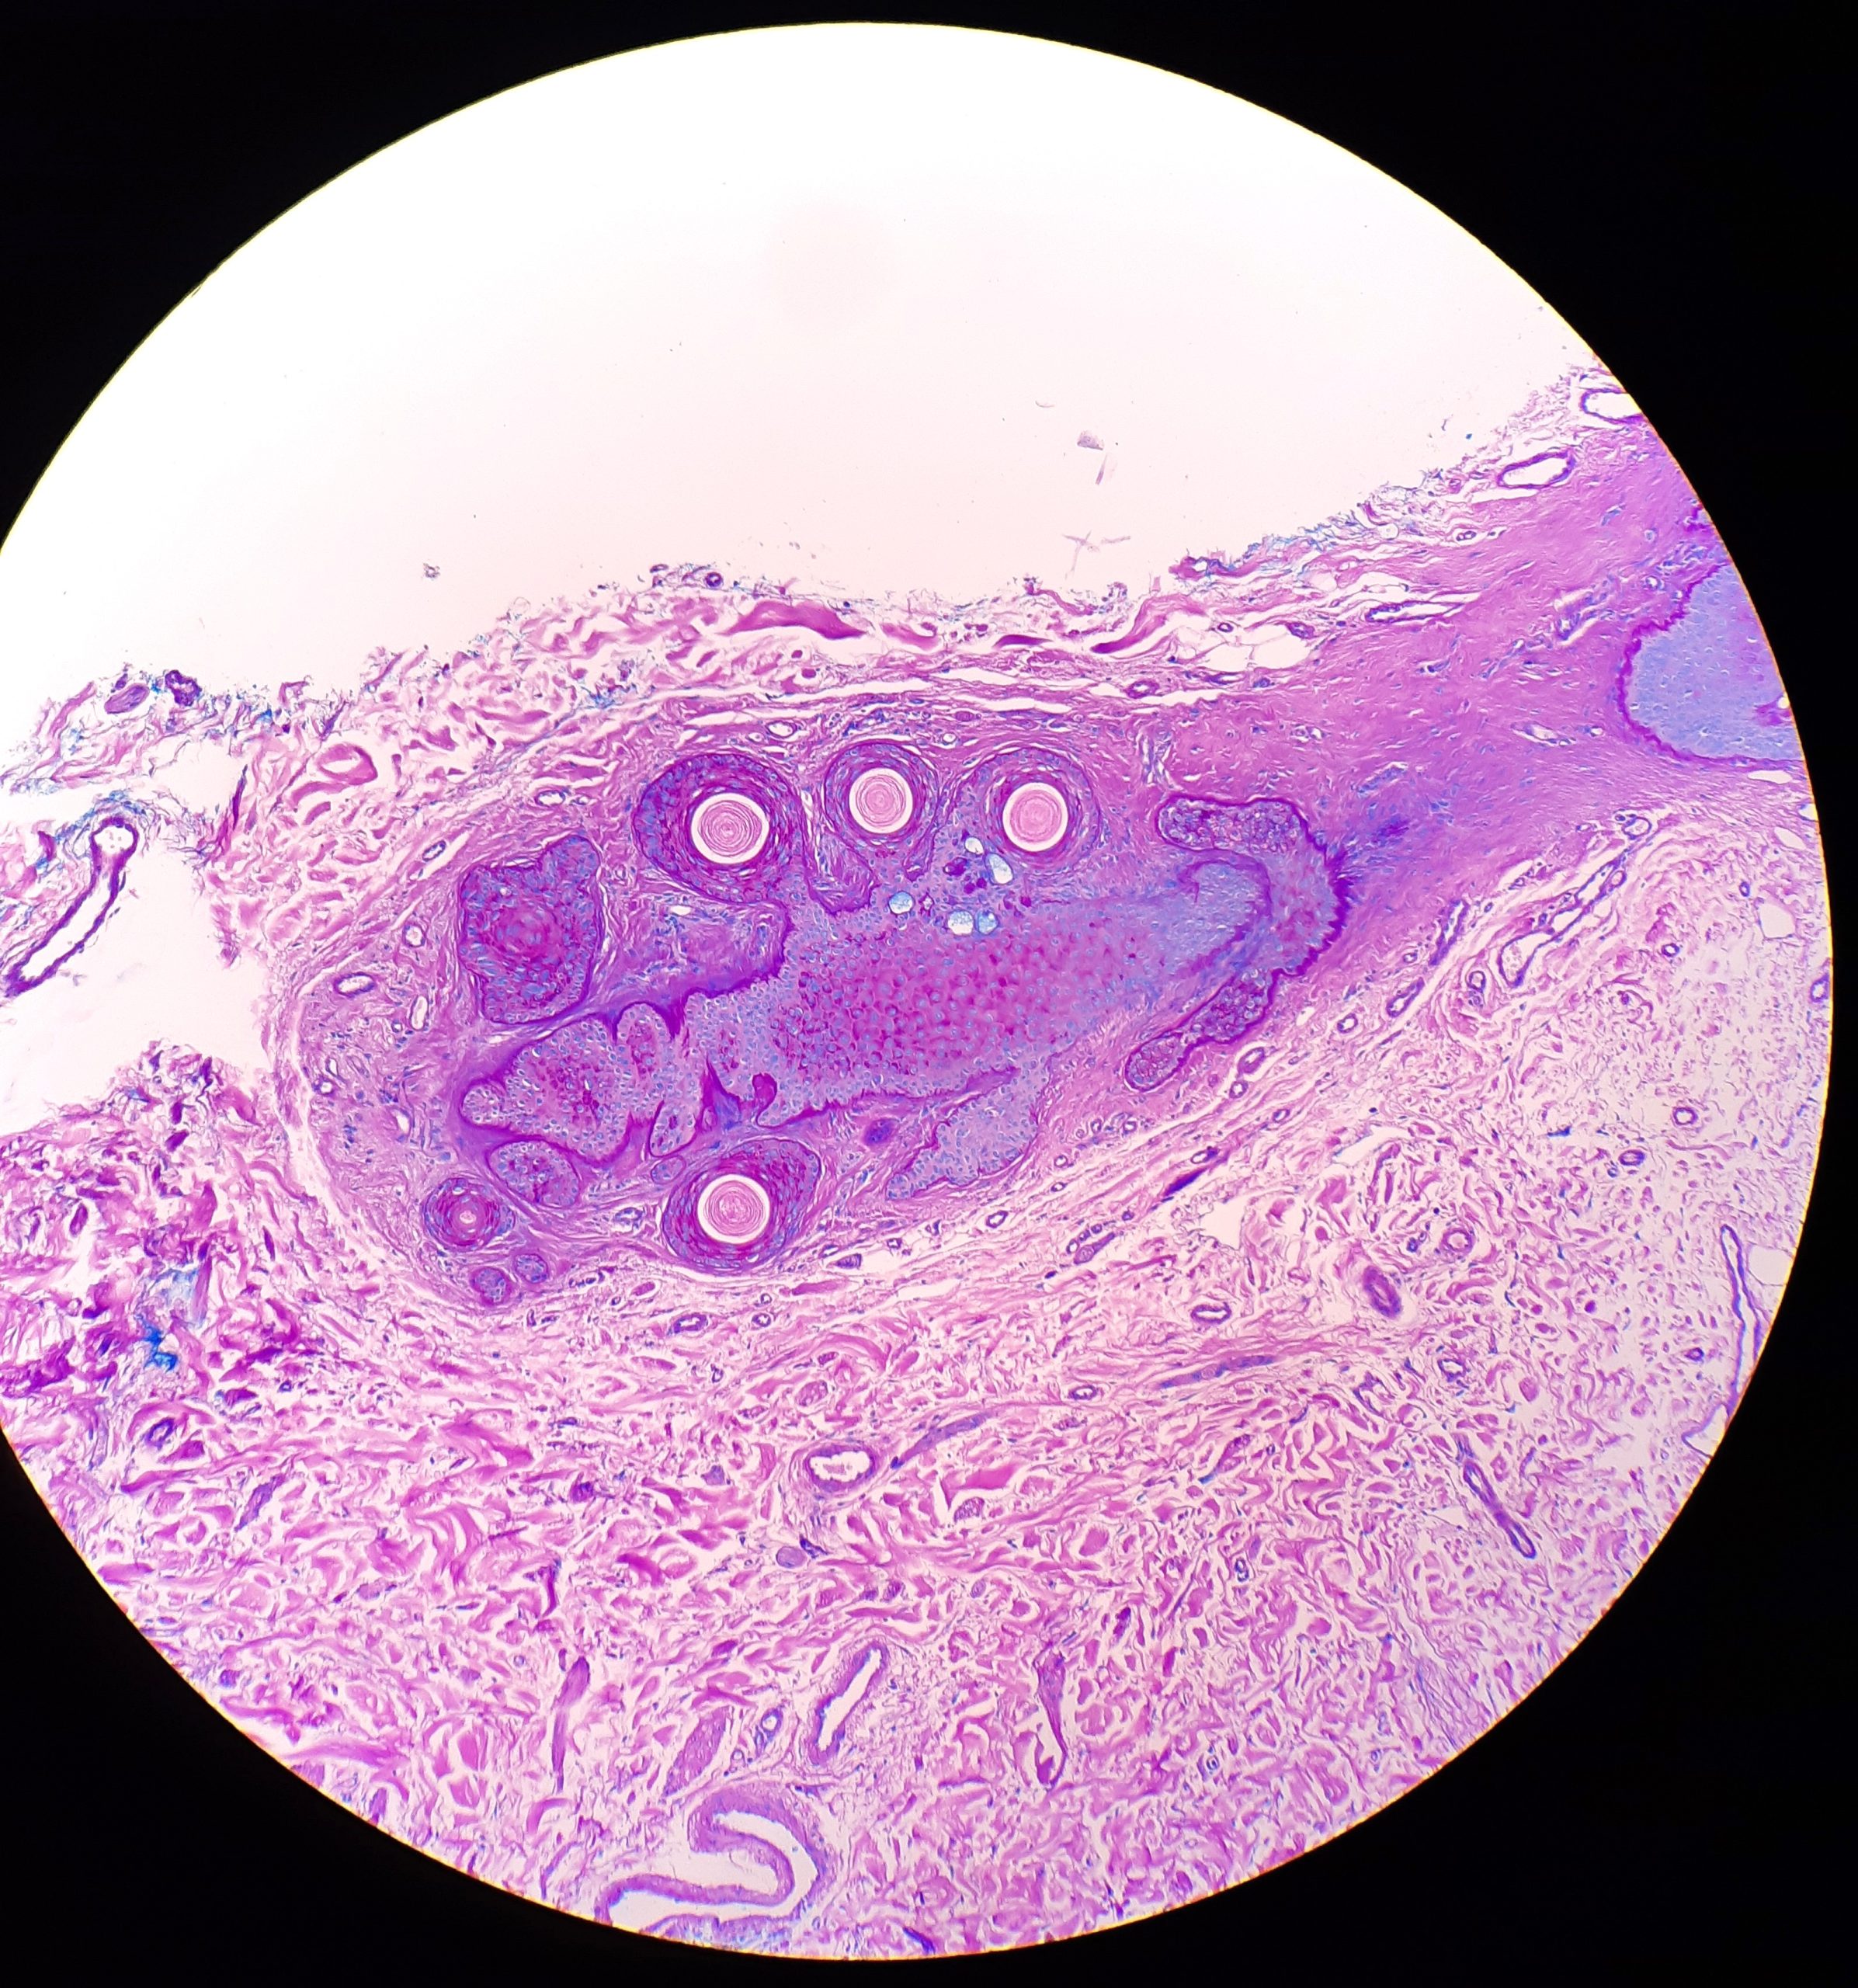
Section of skin tissue

This H&E stained slide shows skin
tissue. It was sliced like a loaf of
bread and laid on its side to get a
full-thickness view through all layers.

7. The reporting stage

The final step in the process to find a diagnosis is the reporting stage. After staining & coverslipping, the pathologist uses a microscope to view the cells. They take into account the patient’s clinical history and other valuable information provided by the surgical team. 

Sometimes a diagnosis needs further tests. Different staining techniques show different structures which are not clear or not found in the routine H&E, and are commonly ordered to confirm a diagnosis. It adds more time to the process but you get a more thorough diagnosis. 

The three pictures below show different staining techniques which show different cellular structures. They are a PAS (periodic acid/ schiffs) stain, a Movat’s pentachrome stain, and a VVG (Verhoff Van Gieson) stain.

Once the pathologist is happy that they have a full picture, they write an official pathology report. This is what your surgeon or GP receives and can now discuss treatment options with you.

Conclusion

So now you know what happens to your biopsy after surgery. You can also see why laboratories can’t give out a result as fast as the TV shows would have us believe! 

It’s an anxious wait for many, but it is necessary to provide the best outcome for the patient.

Over to you – which part of this process did you find the most surprising or enlightening?

BIO: Shari offers efficient website SEO copywriting, grant writing, and technical content writing services for your business. She writes well-researched, credible, thought-provoking material to help position you as a thought leader in your field. Her preferred industries are those in the Medical and Life Sciences fields, but she also helps small to medium businesses in other fields as well.

Share the Post:

Related Posts

Scroll to Top
Skip to content